Ferrules: Sleeves and Stops
2. Ferrules (Aluminum and Copper Cable Sleeves and Stops)
There are 4 material types of Sleeves and Stops:
Aluminum
Plain Copper
Zinc Plated Copper
Stainless Steel

Plain Copper Sleeves

Zinc Plated Copper Sleeves

Aluminum Sleeves

Stainless Steel Sleeves

Aluminum Stops

Copper Stops
There are many different types and sizes of hand swaging tools.
Bench-Mounted vs. Hand-Type Swaging Tools
Bench-mounted swaging tools and hand-type swaging tools serve the same purpose of permanently connecting ferrules to cables using compression. However, they differ in their design and how they are operated:

Bench Type Swaging Tool

Hand Type Swaging Tool
| Bench-Mounted Swaging Tools: | Hand-Type Swaging Tools: |
|---|---|
|
|
Advantage Sales carries a wide selection of Hand Swaging Tools. Many are fitted with multiple cavities to cover a range of cable sizes. Download the Advantage Sales Catalog page on Swage Fittings and Hand Swaging Tools(opens in a new tab) below.
Let’s take an in depth look at Hand Swaging Sleeves and Stops in the next two sections.
Ferrules PT2 - Cable Sleeves
Shaped like an hourglass, Cable Sleeves are generally used to make an eye by feeding the cable end through one side of the sleeve and then back through the other side. The Sleeve is then crimped with a hand swaging tool.

How to Apply Cable Sleeves
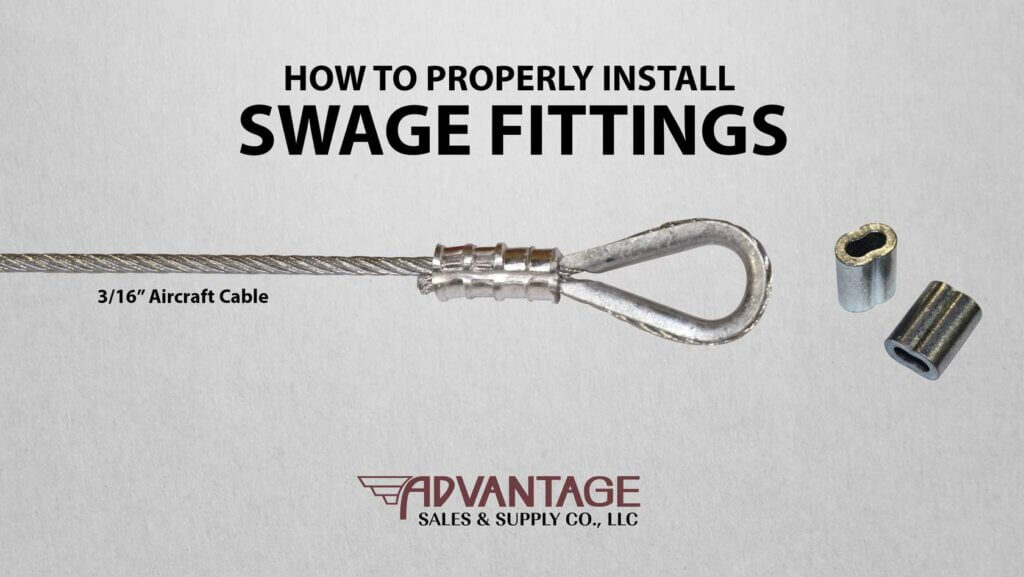
These instructions are for hand swaging small cable assemblies in the field. Hand swaged cables are for light duty applications and are NOT approved for overhead lifting. For this example we will be building a Thimbled Eye with 3/16″ Cable.
STEP 1
Refer to the Advantage Sales Catalog
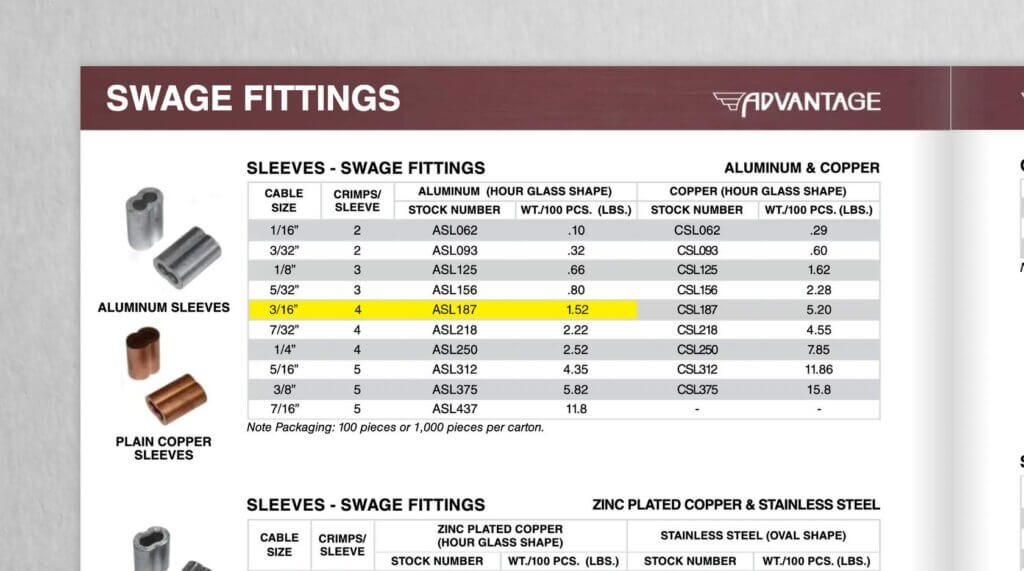
Refer to the Advantage Sales Catalog for size, stock number, and number of crimps per sleeve for use with your application.
STEP 2
Gather Materials
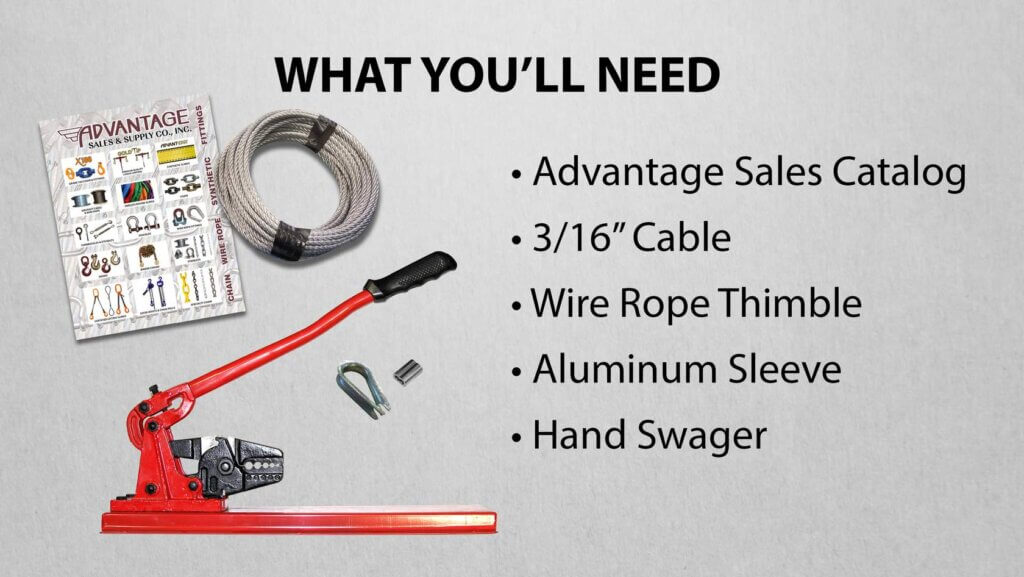
- The Advantage Sales Catalog
- 3/16″ Cable at your desired length
- 3/16″ Wire Rope Thimble
- 3/16″ Aluminum Sleeve
- A Hand Swager and the Swage Gauge included with the Swager (for this guide, we will be using a Bench Mounted Swager – Stock # HSC-600BENCH)
STEP 3
Find the Number of Crimps, and Sequence in the Advantage Sales Catalog
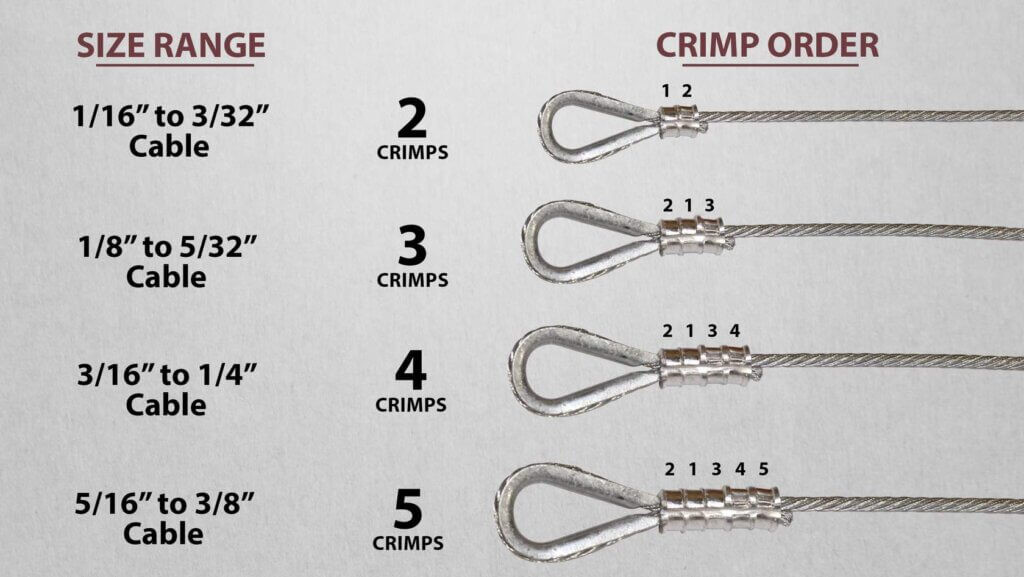
For each sleeve size, there is a specific number of crimps required. Refer to the Advantage Sales Catalog for crimp requirements. For 3/16″ cable, four crimps are required.
When applying ferrules using a hand swager, always make the first swage in the middle of the ferrule. Next, swage the unswaged portion closest to the termination end. Finally, swage the portion closest to the tail end of the cable. For larger cables with more than 3 crimps, use this image as your guide for
STEP 7
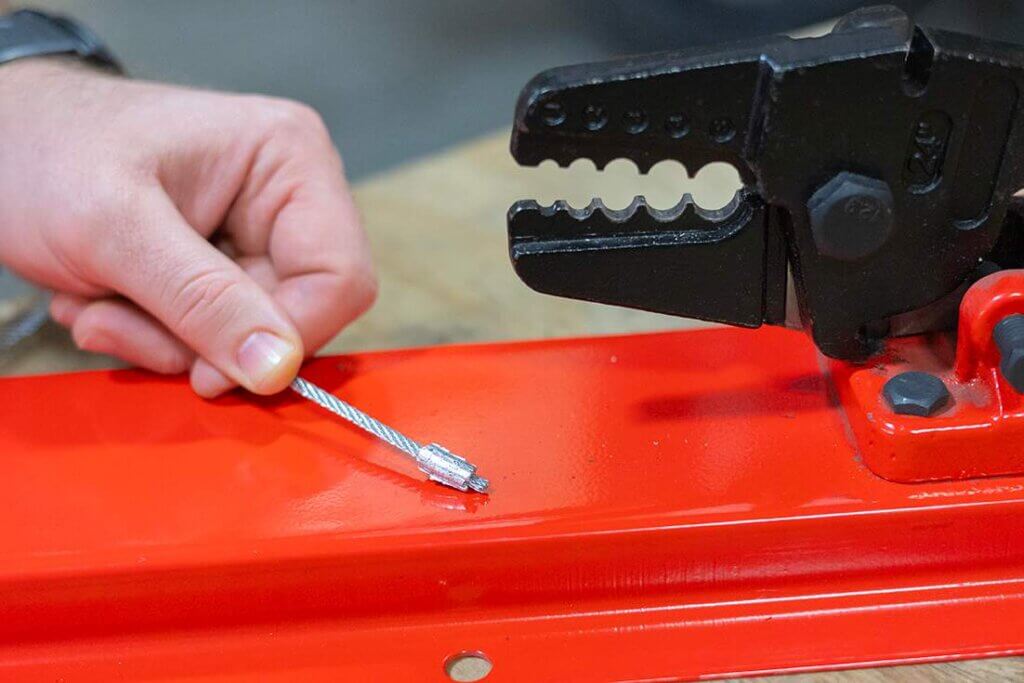
Note: Keep a Tail at the Dead End of the Eye

Note that properly installed sleeves have a remaining tail formed from the cut end of the cable sticking out at the base of the sleeve. This allows for full contact of the sleeve with the cable, as the sleeve expands during swaging. The length of this remaining tail should be equal to the cable’s diameter.
Now that our thimble eye is created, it’s time to swage the sleeve onto the cable by crimping it with the swaging tool.
STEP 8
Optional: Mark the Sleeve with the Crimping Order
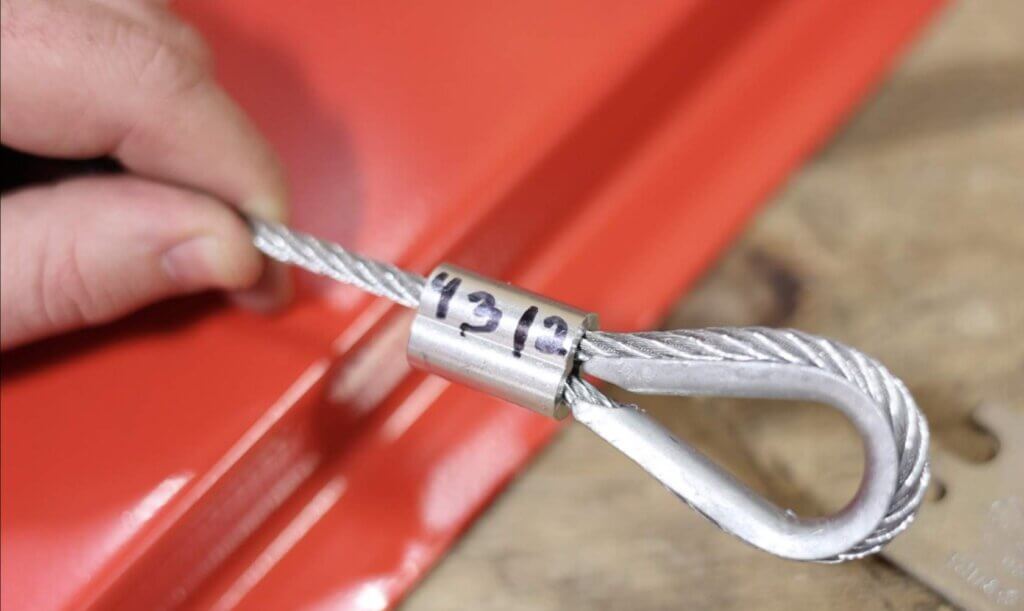
It can be helpful to mark the sleeve in the order you are crimping, shown here.
WARNING
- Sleeves are NOT for overhead lifting. Do not use assemblies made with sleeves for overhead lifting purposes.
- Failure to carefully read and adhere to these guidelines could result in severe injuries or death.
- Prior to installing sleeves, thoroughly review and comprehend these instructions.
- Ensure that sleeves are paired with cable of the same size.
- Follow the sleeves end termination procedures precisely as directed.
- DO NOT install cable sleeves on top of the coating. Instead, remove the coating where sleeves will be swaged.
- Before usage, apply an initial load test to the assembly. This load should match or exceed anticipated operating loads.
Ferrules PT3 - Cable Stops
Cable Stops are used at the very end of a Cable to stop the Cable from going through a hole or keyhole.
Example: 1/4″ Winch Cable with a Stop on one end and an eye with a hook on the other end. In the drum winch, you would place the Stop End into a keyhole slot in the drum winch and then reeve (wind) the cable onto the drum. It’d be much harder to keep the cable in place if there were no Stops holding that cable inside of the drum/keyhole.


Learn to Properly Assemble Cable Stops
Below is a step-by-step guide to applying Cable Stops. Before we begin, It’s important to understand that Cable Stops applied with Hand Swaging Tools may need to use two separate size cavities on the swaging tool to achieve the proper after-swage dimensions. Begin swaging in the same-size cavity as your cable diameter. If the maximum after-swage dimensions are not met, size-down to the next smallest cavity and re-swage the stop until proper after-swage dimensions are achieved.
For the example below, we are using 1/8″ Aircraft Cable and a 1/8″ Aluminum Stop, which does not meet maximum after-swage dimensions in the 1/8″ cavity alone. Follow along in the guide below.
How to Install Cable Stops
These instructions are for hand swaging small cable assemblies in the field. Hand swaged cables are for light duty applications and are NOT approved for overhead lifting. For this example, we will be swaging 1/8″ GAC with a Aluminum Cable Stop End Termination.
STEP 1
Gather Materials
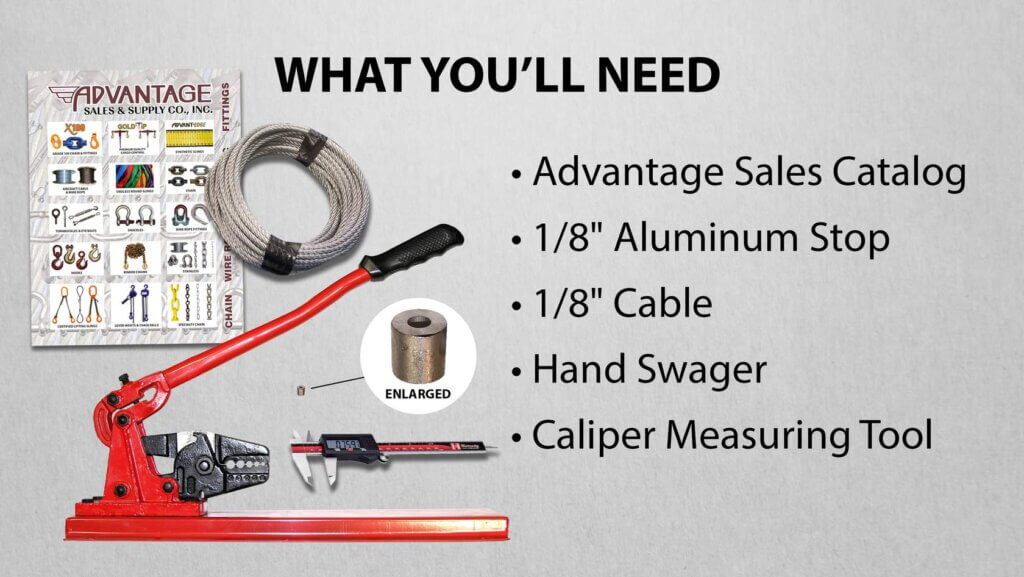
You’ll need the following pieces to create your assembly.
STEP 3
Insert the Stop and Cable into Same-Size Cavity
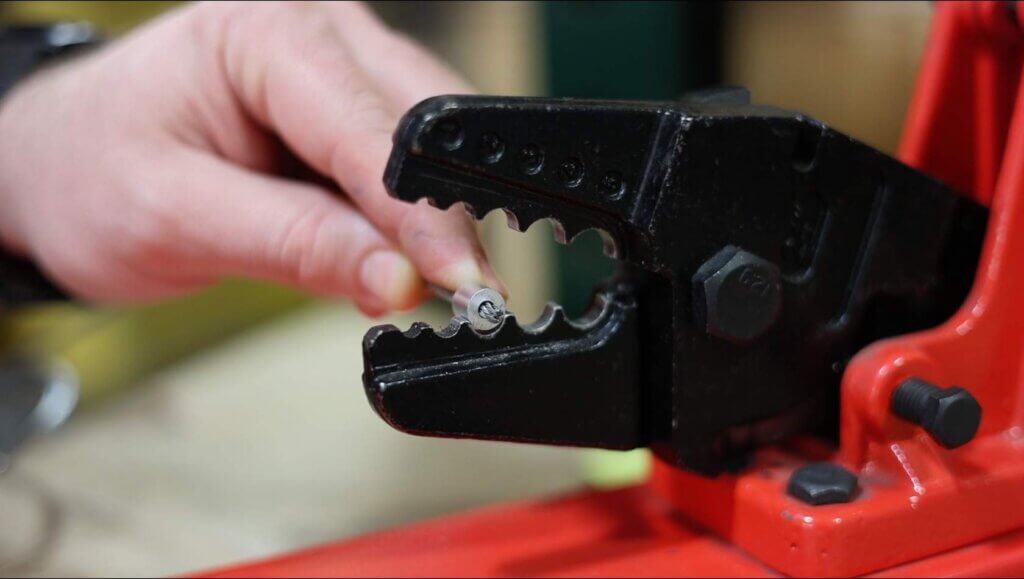
On this bench mounted hand swaging tool, there are 5 cavities (1/16″; 3/32″; 1/8″; 5/32″; 3/16″)
Insert the Stop into the 1/8″ cavity, and center the stop in the cavity. Confirm that the tail remains in place.
STEP 6
Confirm Proper After-Swage Dimensions
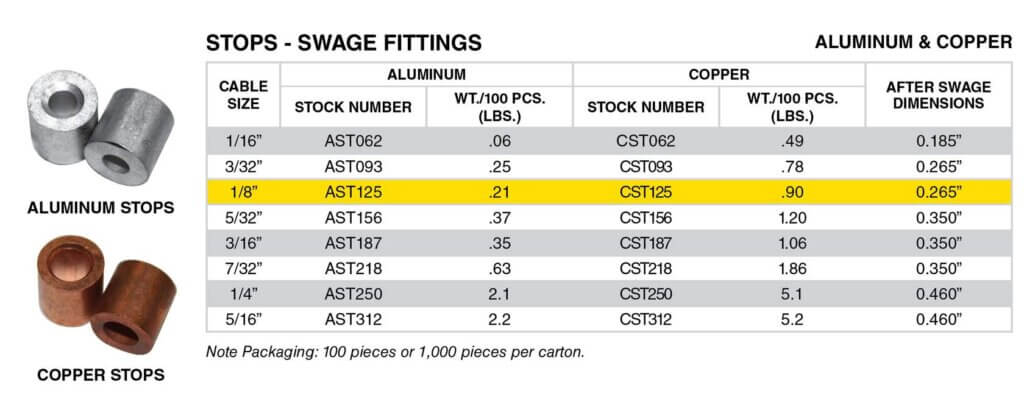
Refer to the Advantage Sales Catalog to find proper after-swage dimensions.
STEP 7
Measure the Swaged Stop with a Caliper
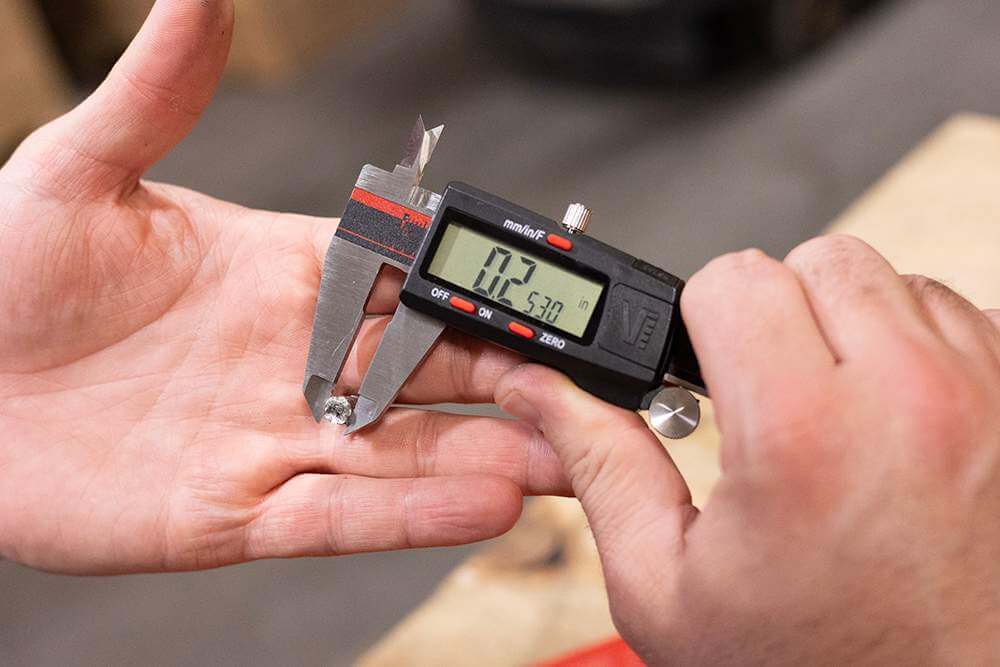
Using a measuring tool, like this digital caliper included with this bench mounted swager, measure the Stop on all sides by rotating the stop 360 degrees in the caliper.
If any sides of the stop measure above the maximum threshold, re-crimp to the proper value, ensuring the swager is closed fully for maximum compression.
When all dimensions measure under the maximum after-swage dimension found in the Advantage Sales Catalog, proper installation is complete.
WARNING
- Stops are NOT for overhead lifting. Do not use assemblies made with stops for overhead lifting purposes.
- Failure to carefully read and adhere to these guidelines could result in severe injuries or death.
- Prior to installing sleeves, thoroughly review and comprehend these instructions.
- Ensure that stops are paired with cable of the same size.
- Follow the stops end termination procedures precisely as directed.
- Do not use stops above cable coated in plastic. Instead, remove the coating where sleeves will be swaged.
- Before usage, apply an initial load test to the assembly. This load should match or exceed anticipated operating loads.
Ferrules PT4 - General Info
8 General Facts about Stops & Sleeves
FACT 1

Aluminum is most commonly used on Galvanized Aircraft Cable. It is the most cost-effective type of Ferrule.
FACT 2

Sleeves and stops made from Stainless Steel, Plain Copper and Zinc Plated Copper materials are the only ferrules approved for use with Stainless Steel Aircraft Cable.
FACT 3

Due to being dissimilar metals, do not use Aluminum ferrules and Stainless Steel cable together. The use of Aluminum Sleeves on Stainless Cable is NOT safe.
FACT 4

Copper and Zinc Plated Copper Ferrules ARE able to be used with Galvanized Aircraft Cable. Some people prefer Copper Sleeves because they say that the Copper flows better into the cable. Our testing shows that if applied properly, both Aluminum and Copper Sleeves are safe.
FACT 5

When applying an Aluminum or Copper ferrule using a hand swager, always follow the guide picture above for hand swaging sequence.
FACT 6

Zinc Plated Copper is used in applications where the end user doesn’t want to see the Copper Ferrule turn green. Zinc plating doesn’t last forever, but it does offer some corrosion resistance.
FACT 7

Because Aluminum and Copper are both very soft metals, they can be applied in the field using a Hand Swaging Tool. There are several tools that are used to cover the entire size range.
FACT 8

Although Stainless Steel Sleeves are rarely used, they are still available from Advantage Sales. They need to be applied by a qualified sling making professional who has the proper hydraulic equipment and swaging dies. Please call an Advantage Sales team member for more information.